Blogging is nothing new. Most businesses are running some sort of blog now to stay in front of their target audience with relevant and useful information.
WordPress is hands down the best blogging platform out there. And it can also serve as a CMS for your website needs. We know that not everyone has a blog and some smaller businesses may be looking to take the plunge.
Before you do, take a few minutes and read this walkthrough. This will make setup much easier.
WordPress Website Setup Prerequisites
Some prerequisites before you get started:
- You want to make sure you have the latest version of WordPress
- Quality web hosting, preferably one that specializes in WordPress websites
- A domain name, and hold onto the login and billing info for this so you do not lose it
You can download the latest version of WordPress is available for free from https://wordpress.org/download/.
There are plenty of services for obtaining webhosting and a domain name at a low cost and sometimes the webhosting comes with a free domain name. In this blog post we are going to be using XAMPP as our web hosting provider and localhost as our domain name.
The process will be similar between different web hosting providers. So, let’s begin!
Step One – Add WordPress to Your Hosting Environment
Once you’re acquired your webhosting and domain and the DNS has propagated, you will want to get the latest version of WordPress downloaded and extracted to your desktop or a location you can easily remember so you may access it later in the next steps.
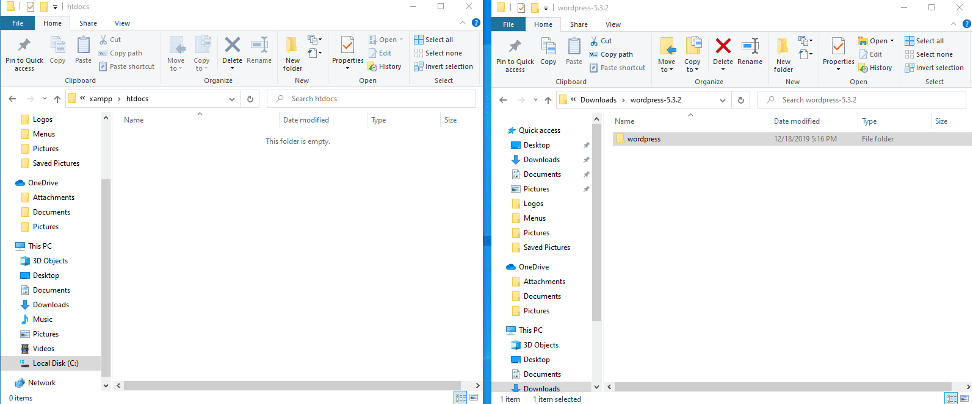
Inside the extracted WordPress folder, there will be several files and folders. You will want to upload all of these to your webhost, you may use an FTP client such as WinSCP or FileZilla by providing these applications your FTP credentials.
These can be obtained within your webhost’s dashboard or if your webhosting provider has a built-in FTP client you may be able to upload the WordPress zip archive and extract the files to the root of your webhost. Different webhosting providers have different naming conventions for these folders. It should be a folder named “htdocs” or “public_html”.
Step Two – Setting Up A New Database for Your WordPress Website Files
When all the files are uploaded, navigate to the phpMyAdmin area in your webhost dashboard and create a new database for your WordPress installation. Make a note of the database name, username, and password you’ve just created.
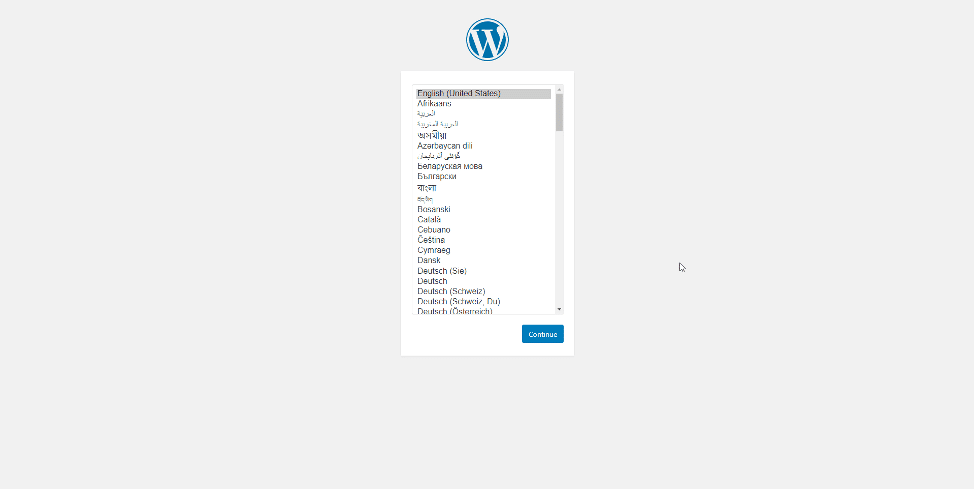
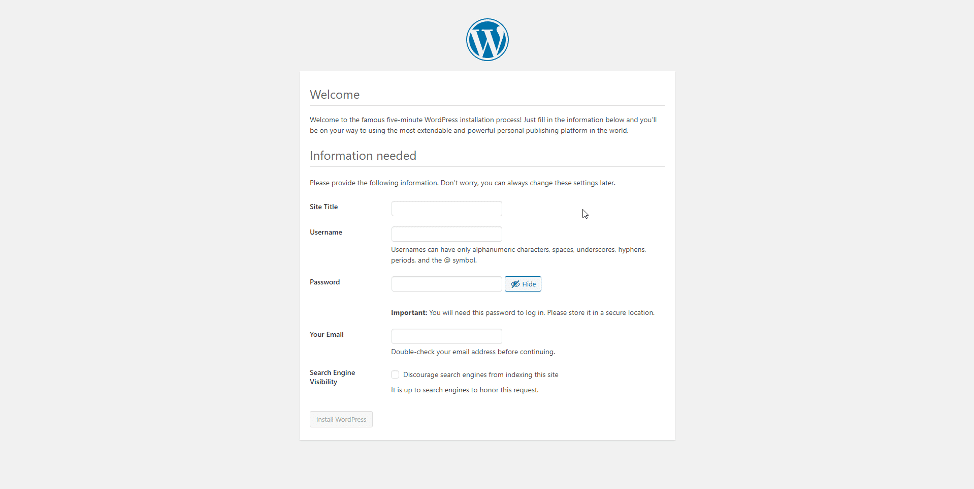
Now to install WordPress, go to your domain name in your web browser, i.e. enter www.yourdomain.com into something like Chrome or Firefox.
You will be prompted with the WordPress installation screen. Go ahead and pick your language, follow the onscreen instructions, and input the information you saved from the phpMyAdmin database you created earlier.
Step Three – Themes and Plugins for Your New WordPress Website
When you’ve finished the setup and have WordPress installed, create the website you want by browsing through different themes and plugins to use, which are accessible in the WordPress dashboard when signed in as an administrator.
WordPress comes with a few plugins and themes installed which you may use or choose to remove whenever you wish.
There are various tutorials and resources online to find plugins and themes you may want to use on your new WordPress blog. WooCommerce is great for making an online store while Elementor is a page builder for creating website content.
Then, to view your website while logged into the WordPress dashboard, click the title of your blog on the top left admin bar or hover over it and click “Visit Site”, make sure any changes you made are saved.
Step Four – Configuring Your New WordPress Website
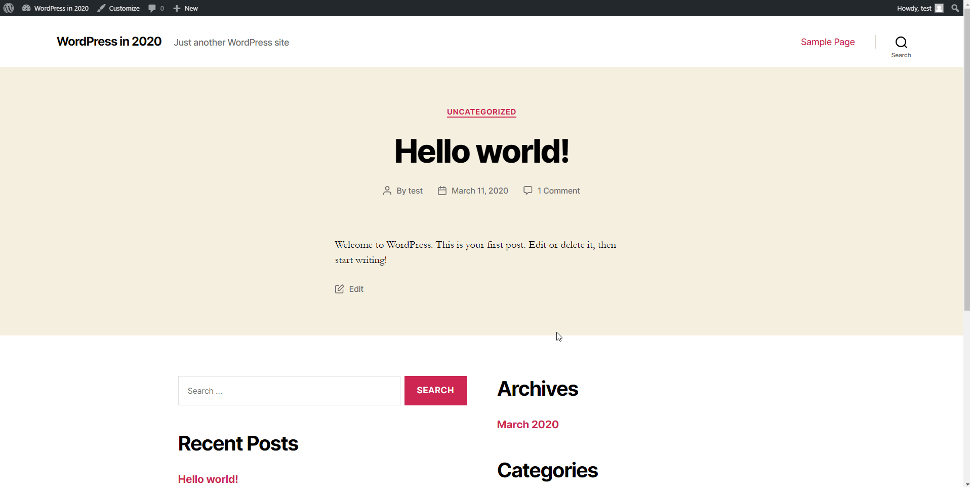
If you’ve made it this far in this WordPress in 2020 guide, then you will now be seeing your current homepage of your website. WordPress sets the homepage to show blog posts by default.
Configuring Your WordPress Homepage
You’ll likely want your homepage to show information or features of your brand. Here’s how to do this…
- Head back into the WordPress admin backend. Do this by hovering over your website title on the top left in the admin bar and then clicking “Dashboard”.
- Once there, go to the settings area of your blog, which can be seen at the bottom left of the admin sidebar.
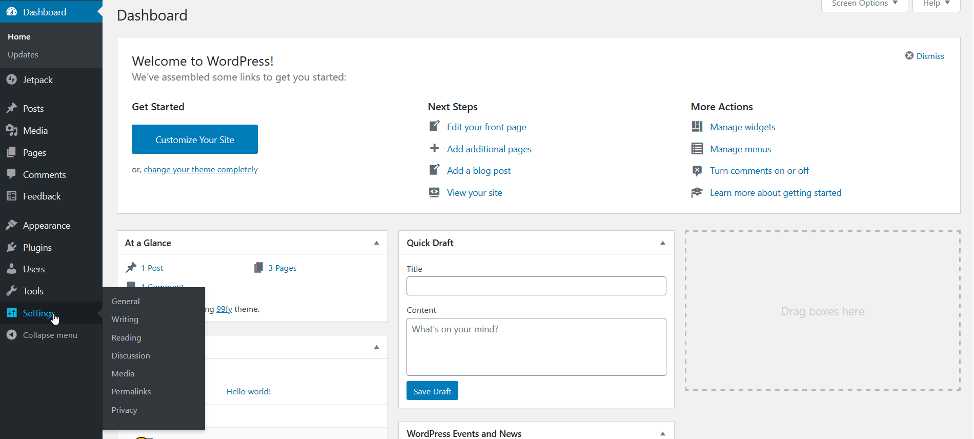
- Hover over the settings menu item to see categories under the settings area and click the “Reading.” Once there you will see a page like the one below.
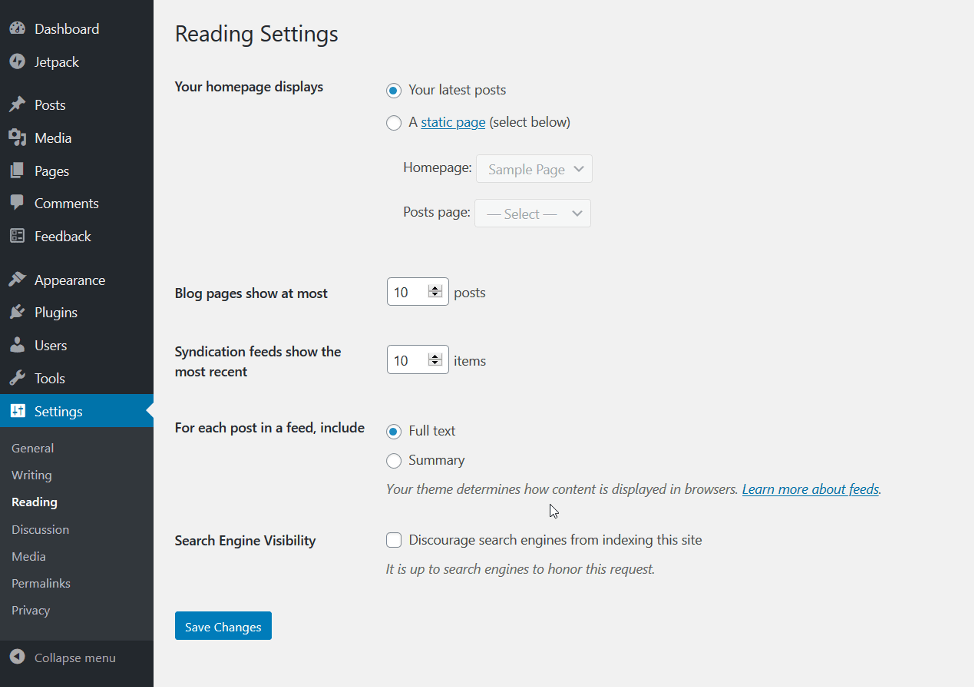
If you rather keep your website as a blog, then there isn’t anything here to change other than the display options for amount of posts and items to show.
However, if you want to make your blog a separate page to give your homepage a custom look and feel, then change to the “A static page” option.
Change the Homepage dropdown to the page you want to use for your homepage and then the same for the Posts page for your blog posts.
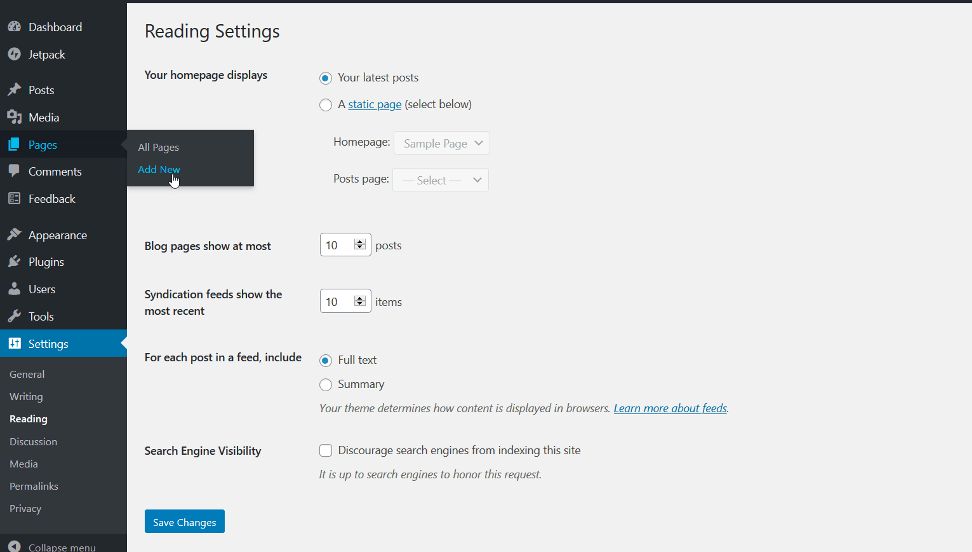
Adding Pages to Your WordPress Website
If you plan on using this as your website, you’ll want to setup some pages. To create pages…
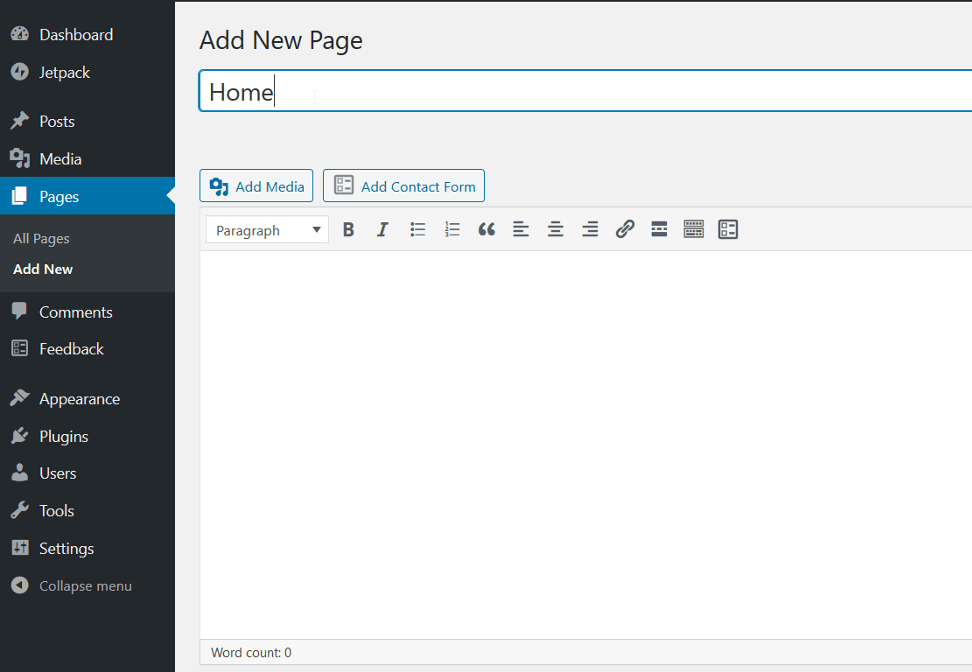
- Hover over the “Pages” menu item on the left admin sidebar and click the “Add New” link.
- This will bring up the page editor where you can add content, images, links, etc.
- Name your page and click the blue “Publish” button on the right side of the page to save the page.
- Now go back into the “Reading” settings area and set the pages you want to show for your homepage and blog page.
Congratulations, you now have your blog website setup. Now, take some time to work on your homepage, where you can experiment with different themes and plugins to create your website into something unique for personal or business use.
Now you’re ready to do some serious content marketing. We’ve written a post that will help you organize your content.
Of course, if you need any help with this, send us a note or give us a call at 717-457-0522.